Skip to content
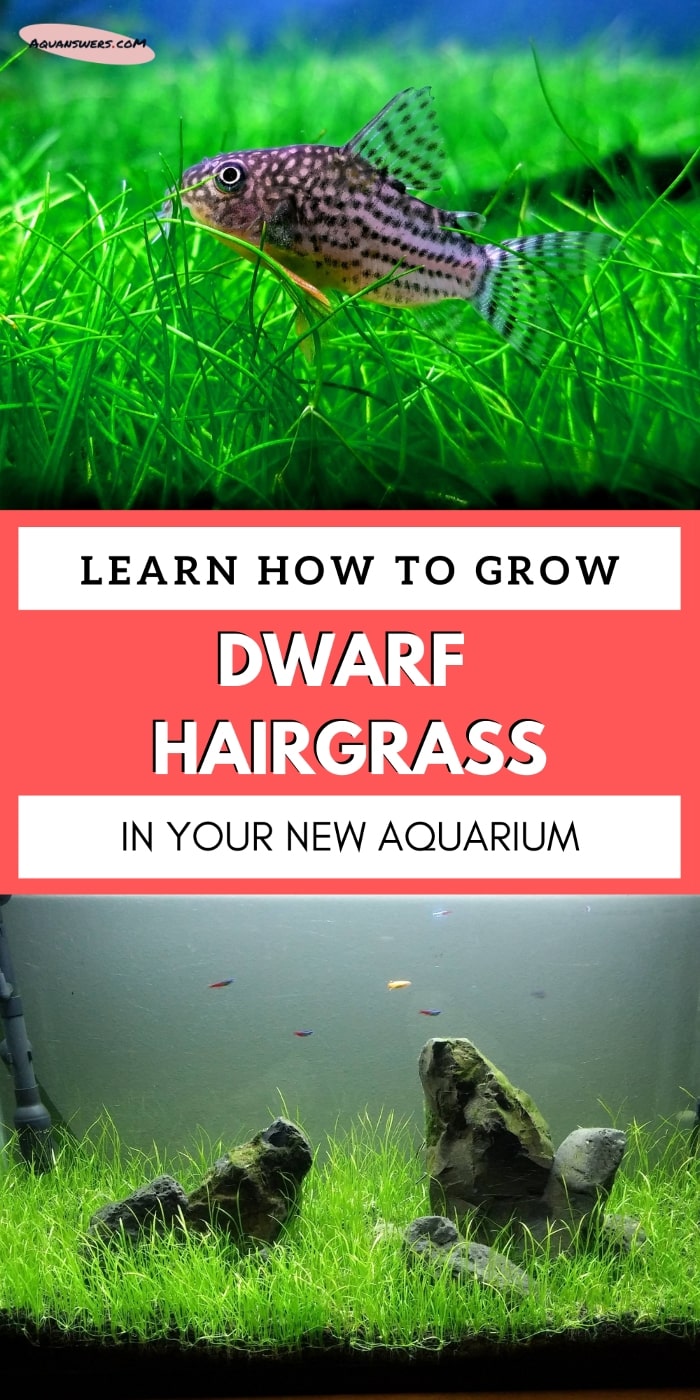
In this comprehensive guide to dwarf hairgrass care, we delve into the intricacies of cultivating and maintaining this quintessential carpet plant. While the dwarf hairgrass may seem straightforward to care for at first glance, mastering its nuances is key to achieving thriving growth and a visually stunning aquascape.
Having a beautiful carpet plant in your aquarium is a must if you’re aiming for a professional-looking aquascape. Consider this post as your ultimate cheat sheet for dwarf hairgrass care.
Generally speaking, the dwarf hairgrass is not a difficult aquatic plant to look after but there are a couple of tricks you should definitely be aware of before proceeding. Many hobbyists approach the planting wrong and that’s absolutely essential for successful growth.
I discuss that in detail below, as well as other hairgrass peculiarities, so let’s not waste more time and jump straight to the facts.
Introduction and Overview of Dwarf Hairgrass (Eleocharis parvula)
There are 3 plant species of underwater-tolerant dwarf hairgrass, that are available in the aquarium trade.
These are namely the Eleocharis parvula, Eleocharis acicularis ‘Mini’, and Eleocharis Belem which remains the smallest of all three.
The most popular choice is E. parvula, also known as dwarf spike-rush, because of its faster growth rate and decent maximum height. This species of hairgrass gives aquarists the flexibility of choosing the carpet’s ‘presence’ in their aquascape.
The other two types are slow-growers and remain small overall. For this reason, I recommend resorting to them if you’ll be keeping nano fish or invertebrates in a rather small tank such as a shrimp bowl.
In general, aquatic carpeting grasses are known to be picky growers and require intensive care.
The dwarf hairgrass, however, is more beginner-friendly in that regard.
By following a couple of simple care tips, you’ll be able to successfully cover the bottom of your fish tank with a lush green mat.
Don’t get me wrong though, this plant will still demand your attention and a healthy dash of regular maintenance is a must.
However, I can guarantee you that the results will be worth it.
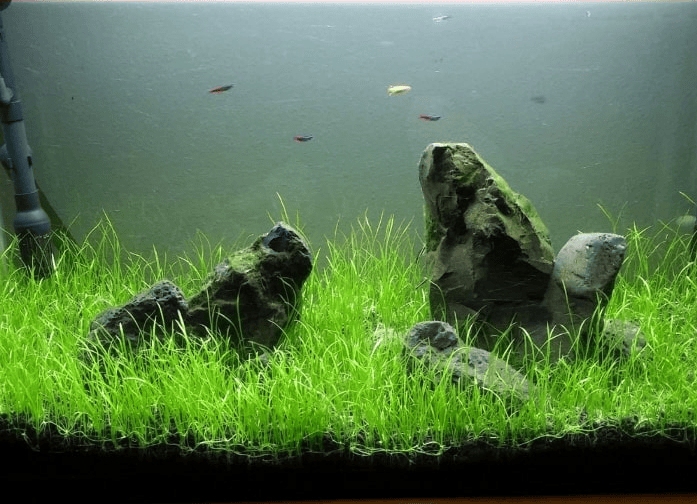
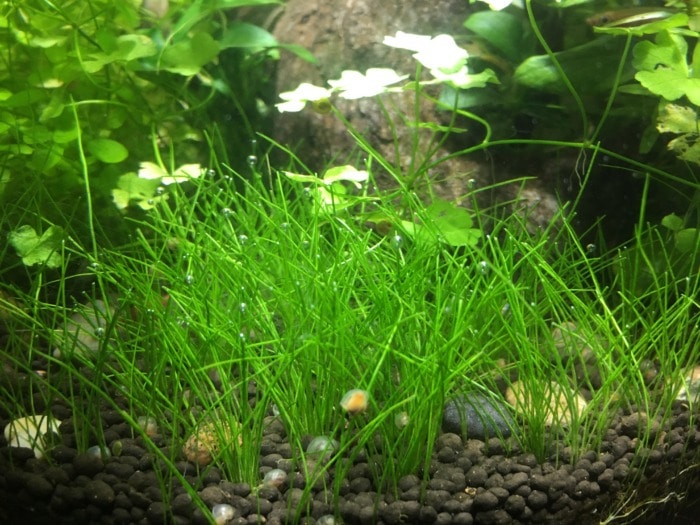
Once you get yours growing it will thrive almost on its own and it will cover all of your planted tank’s free landscape.
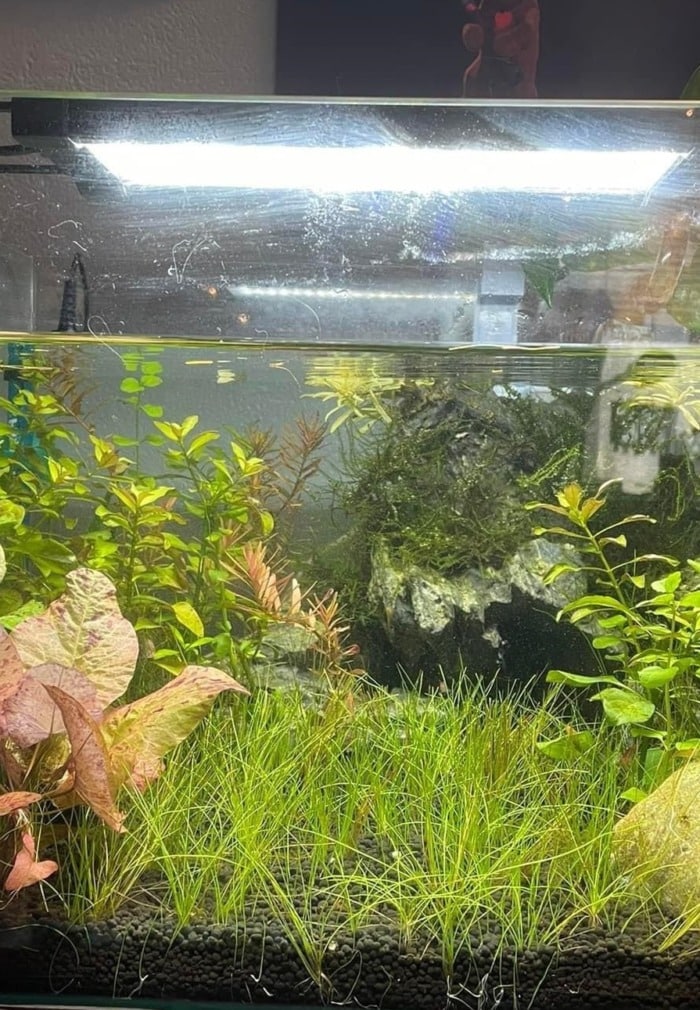
Here’s how a fully-established blanket of dwarf hairgrass looks like in an aquarium:
How to plant dwarf hairgrass the proper way?
There are a couple of very important steps that you’ll need to follow in order to give this plant a proper kickstart. I’ve perfected the process with a couple of subtleties that I’ve found through my own experience, and by monitoring the fish tanks of my clients. Here’s my refined guide on how to plant the dwarf hairgrass in a step-by-step manner:
- Divide the hairgrass into patches of 4 to 6 blades of grass.
If you use bigger patches you’ll significantly slow down the spread speed of the grass.
When using very thin packs the roots and the so-called runners won’t compete with each other and your hairgrass will form a cover much, much faster.
- Trim the roots.
Trimming the roots will guide the energy of the plant to recover the roots faster.
As this type of hairgrass spreads through runners, this is beneficial to a faster spread of the carpet.
- Grab the hairgrass by the roots with a pair of plant tweezers.
Using planting tweezers is somewhat mandatory for planting virtually any type of grass in an aquarium.
Fingers won’t be enough and you’ll experience significant difficulty as they lack the finesse.
Make sure yours are made from stainless steel. I can recommend using these or similar ones, as they’ve done well by me so far.
- Place each patch 1/2 or 2 inch apart. One inch between patches is enough space to stimulate the runners to grow.
I’ve also seen success with spreading the patches 2 inches apart, which is something you could try since it’s less work.
- Push the patches gently into the substrate.
Hold the tweezers at a 45-degree angle and apply a slight push to the substrate.
- Shake and pull the tweezers out when the patch is 1/3 deep.
Shaking is recommended so the substrate can fit itself around the roots of the grass.
This way you can safely pull out the tweezers without uprooting the fragile blades of grass.

And you’re done.
The dividing procedure typically takes me forever and it’s kind of annoying so arm yourself with patience.
However, using no more than 6 blades per clump will achieve the fastest growth and spread according to my experience.
Spending half an hour will save you weeks of slow spread in the long run, so it’s definitely worth it.
How long until you see success after the initial planting?
It’s normal for Eleocharis parvula to start browning at first. Worry not! This is because, often, merchants grow the grass emerged:
These yellowing blades are not used to the underwater conditions and the more fragile ones will fade in the beginning.

What you want to do at this stage is trim.
You’d want to trim the grass every week.
Even if there’s no noticeable growth â trim off a couple of millimeters.
That’s because, at this stage, you need to “tell” the grass that something is preventing it from growing in height in its current environment. This triggers certain survival mechanisms in the plant and it starts spreading horizontally to cover more area instead.
The trimming in the initial couple of weeks aims to just cut the grass, you are not necessarily chasing a certain height you want to maintain.
It’s the process of cutting the grass that stimulates its horizontal spread through more runners and also the emergence of new shoots.
The new blades will be acclimated to being fully submerged and won’t go brown over time.
When trimming you’ll get rid of the withering growth which will force the grass to employ its energy in making new, fresh shoots.
With proper care, dwarf hairgrass should double its carpet coverage in 30 to 45 days.
You’ll witness new runners in just about a week if everything’s going fine.
If you’ve followed my planting process you can expect a 90%-dense carpet between patches at the end of the 4th week.
Not bad, right?
The 4 secrets of growing your own hairgrass carpet
It’s simple really. A beautiful, lawn-like carpet of dwarf hairgrass requires four things:
- Moderate to high lighting.
- A healthy dose of fertilizer.
- CO2 is not of utmost importance, but definitely highly beneficial.
- Trimming
Let me expand a little on these.
1) Lighting and tank depth:
Being a carpeting type of plant it’s understandable why dwarf hairgrass would have higher requirements in terms of lighting.
The deeper your tank, the harder it is for light to penetrate right down to the bottom.
But before you start thinking about PAR readings and whatnot I suggest that you pay a visit to my guide on aquarium lighting.
There you’ll find that it’s all about PUR (Photosynthetic Usable Radiation) and LED lights are doing great at providing the right amount of PUR for your plants.
Just take your tank’s depth into consideration.
If you go over to that post you’ll find that I’ve discussed in detail all aquarium sizes and the appropriate lighting fixtures for each of them – low, medium, and high intensities.
Different tank sizes will demand a different lighting model.
Find your tank’s size and pay attention to the “medium” and “high-tech” lights recommendations.
Since the aforementioned post is on lighting overall, if you’re being serious about your plants you should probably go more in-depth.
I have a complete starter’s walkthrough on that which took me 5 days to put together.
There, I tried to cover everything that considers lighting for aquarium plants, including some well-spread false beliefs considering spectrum and intensity.
Make sure you know these before going after difficult plants, by giving my guide a skim.
Also, please don’t fall for the “watts per gallon” myth!
2) Fertilizers:
When it comes to fertilizing your dwarf hairgrass, it is worth noting that it will greatly appreciate the main macronutrients – Nitrogen, Phosphorus, and Potassium.
There’s an ongoing debate among fishkeepers if the plant prefers being fed through fertilizing the water column or through the substrate.
In my experience, it does not better with a nutrient-rich substrate.
The only evidence I have for that is my own personal observations so there’s that.
To help you with understanding substrates better I wrote this guide on the matter.
I’ve had enormous success with ADA’s Aquasoil (link to see the stuff on Amazon) and I’d rather stick to that as my primary recommendation.
It’s probably safe to assume that the Carib Sea Eco-Complete will also work here, as long as you’re supporting it with a healthy dose of root tabs.
In my black sand-based fish tanks, I use these root tabs called Seachem Flourish and I’m also pretty happy with the results.
Liquid fertilizers are okay, however, if you’re a fan of that.
Bottom liner – use some kind of good aquarium plant fertilizer and make sure it’s providing the N-P-K macronutrients. Visit the link to learn which ones contain the key nutrients for the best plant growth possible.
Here’s a nifty secret: dwarf hairgrass REALLY loves iron. Dosing some iron can make a difference in your end results.
3) CO2:
As with most aquatic plants, injecting some CO2 will definitely benefit dwarf hairgrass:
At a rate of 1 to 3 bubbles per second or around 30 ppm, you will achieve faster, denser growth and a brighter lush green coloration.
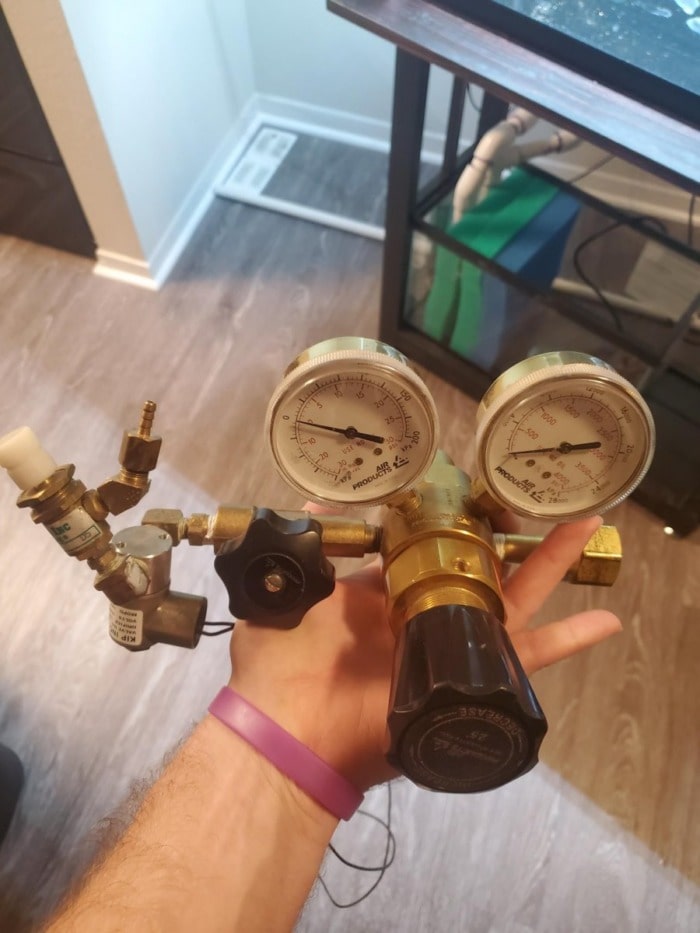
For the best results, you’ll want to have a CO2 regulator with a solenoid that is synchronized with the timer of the aquarium’s lighting.
The regulator should also have a durable needle valve for a more precise bubble count.
If you don’t know what I’m talking about, you should probably check my guide on CO2 regulators for aquarium use.
Anyway, you can grow it without CO2 injection, but it will take your carpet longer to establish.
However, time aside, for a satisfying end result I think that lighting combined with the right balance of nutrients will have a greater impact on DHG than CO2 injections.
That’s just my personal experience.
Supplying CO2 will suppress any algae growth though, which can definitely emerge with the combination of high lighting and nutrient-rich fertilizers.
Author’s note: If your hairgrass has a bit of a flow going (very light, not to cause uprooting) it will be way more difficult for algae spores to attach themselves to it.
4) Trimming:
In the carpeting phase, you’d want to trim your new aquarium grass whenever it grows taller than around 2 inches or each week (whichever happens faster).
Cutting it back to around 1.5 inches encourages the horizontal spread and you’ll have a lush green carpet way sooner than without regular trimming.
If left uncut the E. parvula variety of dwarf hairgrass will reach a height of about 4 inches (or around 10 centimeters).
Anyway, one of the most common issues with any carpeting plant is the lack of lateral growth.
If you have issues with getting Dwarf Hairgrass to spread then you should trim even deeper.
I learned this the hard way, but interestingly enough not through looking after carpeting plants:
My first house plant was Spathiphyllum, a plant better known as Peace Lily.
Even though I got the Spathiphyllum because my research showed that it requires little care I still managed to almost kill it.
Long story short, all of its leaves and stems withered.
In an attempt to save the plant I trimmed all of the dead matter as deep as I could. From what I’ve read back then removing the dead parts would allow the energy of the plant to go into creating new shoots.
And new shoots it created.
After some time my Peace Lily was back on track but there was one noticeable difference.
Before the accident, the new shoots were trying to grow horizontally. After the deep trim, everything stayed short and tried to spread laterally.
Naturally, I followed my own experience and experimented with dwarf hairgrass in my initial trials with it.
It turns out that the little trick of trimming deep worked like a charm.
I recommend using this trick if the carpet does not want to spread, despite you doing everything else seemingly correct.
For a deep trim – cut your dwarf hairgrass to less than an inch or even lower if possible to do so without uprooting it.
How to propagate dwarf hairgrass for a better carpet?
Fortunately, nothing is required of you to propagate dwarf hairgrass.
This type of aquarium grass propagates on its own through its “runners”.
The only thing you need to do right to stimulate that propagation for a denser carpet is spacing the patches correctly when planting them and providing fertilizer.
Growing it in a sand-only substrate
So you have an established tank with a sand bottom and you’d like to spare your fish and shrimp the stress of installing a whole new substrate layer?
Good. It’s absolutely doable:
Since dwarf hairgrass leans on the root feeder side of the aquatic plants you’d still want to supply it with nutrients from your substrate. Sand is more than ideal for this plant because it will hold the grass down without compacting enough to prevent its roots from spreading.
Buy root tabs and spread them around in your aquarium sand.
Make sure that the sand layer is at least 2 inches deep, before the planting.
It won’t be redundant of you to use fertilizers in the water column as well. The more the better.
This is the exact way I’ve grown it in my aquarium setups, by the way. I have been using pure black sand for most of my tanks.
A practical dwarf hairgrass hack: Don’t place the root tabs directly underneath the patches of grass. Bury them in the sand between the separated patches. This way you’ll encourage the runners to spread even faster, as they’ll grow towards the source of nutrients.
Growing Dwarf hairgrass in a coarse gravel substrate
You can grow dwarf hairgrass in a coarse substrate such as gravel, but there are a couple of things to consider:
The hairgrass will have a slightly harder time forming a carpet in gravel, as its runners won’t spread as easily as they would in the sand. You’d need to supply it with root tabs at the least in order to achieve a lush lawn-like appearance.
That being said, you’ll also have a harder time planting your DHG.
Plant tweezers are a must here because otherwise, the grass blades will have a tendency to escape the gravel easily.
If you have bottom-feeders that like to uproot fragile plants you’ll probably need to cover the plant with a protective net.
Recommended: How much gravel do I need for my aquarium? (Formula + Tips)
Dry-starting Tips
You can use the dry start method when you grow your dwarf hairgrass, but it comes with its pros and cons:
The grass will grow faster emersed and it will form a carpet real quick.
If done right, you can expect a carpet by your third week.
Plant your dwarf hairgrass as described above to encourage the growth of its root runners even more.
Make sure that you leave some kind of ventilation (a hole in your plastic) or you’ll induce the appearance of mold or even rot.
The con of the dry starting is that whenever the plant has been grown emersed you will inevitably lose some of it when you fill your fish tank with water.
The melting and yellowing will happen just days after the plant goes submerged.
To encourage new underwater shoots you’ll need to trim.
This somewhat balances out the quick growth you’ll achieve when the grass is emersed.
Growing dwarf grass from seeds usually takes a couple of weeks longer.
That’s not recommended if you’re eager to start your aquarium carpet sooner.
Can you buy Dwarf Hairgrass from your couch?
And more importantly – will Dwarf Hairgrass be safely delivered when purchased online?
If you like the comfort of online shopping I will save you the time for research and point you in the right direction:
I am personally pleased with this Amazon seller.
They go the extra mile and really emphasize delivering the plant alive and healthy. It comes in a protective gel that keeps the hairgrass hydrated during the trip.
Note that they grow it emerged and you’ll see some yellowing at first, but as I mentioned above – trim and you’ll be alright.
Conclusions
If you follow the above advice I can guarantee that you won’t end up as the owner of a perishing dwarf hairgrass plant.
I’ve seen quite a few fail to keep theirs alive, but from my experience, it’s all about being well informed beforehand.
This aquatic plant is the perfect candidate for a super attractive aquascape and the possibilities of one are endless.
Your imagination is the limit, literally.